Sunday, November 27, 2011

Counting Down the Days Advent

I am so excited to show you one of my favorite crafts I have made this year for the holidays. Last weekend, it was a full on girls weekend of scrapbooking and crafting. It was my mom, sister, sister-in-law, and niece. There was one exception to the No Boys Allowed rule though.... three month old Preston got to come along, which was totally fine with me. We got to bond a couple of times :)
Anyway, I worked on some thank-you notes and a little scrapbook that I got years ago. But my favorite project of the weekend was this cute little Advent calendar! I saw it about a month ago on Pinterest and knew right away that I would be making one for my family.
Having a 5 year old, I know that his concept of time is a bit skewed. Kids wake up wondering, 'is Christmas TODAY?!' or 'Is Christmas the day after the next day and then 2 days after that and then I go to sleep and THEN it's Christmas?' So then you make those chain count-down thingies, and although they do serve the purpose, they're just not nearly as cute! And they're also done after you use them. Paper being thrown away, and you have to make a new one next year. So I gave it a try, and it was so much fun! From picking out the papers to coming up with the best way to lay out the numbers. I had a great time creating it, and starting December 1st, we're going to have a great time counting down the days till Santa gets here!


Saturday, November 26, 2011

Perfect Pie Crust


Pie crust seems to be something that people are scared of. And I have to admit that I used to be one of those people. But now, I have realized that pie crust can be easy. You just have to keep a few things in mind. I hope to convince you that you do not need to be scared of pie crust.
I have tried many different so-called PERFECT pie crusts. I have heard tips and tricks all over the place. With all the recipes I've tried and the pie class I've been to, I feel like I've finally figured out the winning combination to creating an unbeatable crust that will hold whatever sweet pie filling you choose.

Perfect Pie Crust
makes a double crust

3 cups flour
2 Tablespoons sugar
1 teaspoon salt
10 Tablespoons unsalted butter, cold
10 Tablespoons vegetable shortening
1/4-1/3 cup ice water

Alright, here's your first key to pie crust success. Everything goes in the fridge for at least a couple hours before starting. This includes your bowl, your pastry blender, your flour and sugar... everything that you will be using. Warmth is your enemy in pie crust. Remember this!

In a large COLD bowl, combine the flour, sugar, and salt. Add the butter and shortening. I have a nifty little trick for butter. Grate it with your cheese grater! Hold onto the butter with the wrapper still on the end so as not to warm the butter too much with your body temperature.

Mix this all together with a pastry blender until the consistency of coarse cornmeal. Small chunks of butter and shortening is what you're looking for.... Did I mention, this pie crust will probably require an extra 30 minutes on the elliptical!

At this point, add your ice water. Start with just about a 1/4 of a cup. Combine with a fork until just barely blended. If it's not coming together completely, add just a bit more water! A little goes a long way. Too much water and over-mixing will give you a thick, tough, and non-flakey crust. This is what you DON'T want. Use the fork to mix together until you're ready to form into 2 equal discs. That's the only time you should be using your hands to mix. Mixing with hands = warming of the dough = bad.
Once you have formed into 2 discs, wrap in plastic wrap or parchment paper and refrigerated for 1/2 hour. This will re-chill the dough before you start rolling it out for your pie. I used to make the mistake of thinking you could make the dough and then refrigerate or freeze for days on end. No - not an option. Your crust won't be fresh, it'll be tough, and did you know it starts to turn a GRAY color?! not appetizing! This crust is easy enough to pull together that there is definitely time to whip it up right when you need to bake it. No need to prepare ahead of time.


So after your 1/2 an hour has passed, generously flour your counter space. Or if you're like me and don't have much counter space, move your operations to your kitchen table. Place your disc of pie dough on the flour and sprinkle a little more flour on top of that. With your rolling pin, roll out in all directions until you have somewhat of a circle shape slightly bigger than your pie pan. Don't worry about the circle being exact - just a general roundish shape.


I then fold the circle in half, and then half the other way so you have a triangle. I should've taken pictures of this, but since I didn't, I'll do my best. Put the point of your triangle in the center of the pie pan and gently unfold. This should center your crust pretty closely.

Fill your pie with your favorite pie filling. If you're at a loss of what to fill it with, try out my Apple Pie! You won't be disappointed. Roll out the second pie crust and place on top. Or you can make a fun and beautiful lattice-topped crust.

Lattice Top Apple Pie


I feel like it's been ages since I visited my blog. You would think that with all the delicious food this time of year, there would be a ton to blog about and I'd have a couple posts a day. It's not that I haven't been baking and cooking - it's just that I've been enjoying the Thanksgiving holiday and really haven't wanted to interrupt it with blogging. Just like I get a 4-day weekend from my 9-5 job, I have felt like I needed to take a little break from this too. There is nothing more important to me than family. There is nothing that I am more thankful than my family. I'm pretty sure I told Xander how thankful for him about 5,415,265 times. He is my pride and joy. He's a big part of what has made me who I am today. And Tiffani - I couldn't be more thankful for my new wife! Spending time with my little family and our extended families has been so great. We spent the day eating a great dinner over at Tiffani's mom's house with lots of family. After a few hours, we dropped Xander off with his dad and headed over to my parents' house for dessert to spend time with them and my sister's family. Oh my, the dessert! There was a banana cream pie, pumpkin pie, better-than-sex cake, and I brought my signature Apple Pie. I may or may not have eaten leftover apple pie for lunch yesterday.
I have been making this pie for about 6 years now, and it's one that I feel I've finally perfected. I think ever since my dad told me it was better than the frozen (yet delicious-o) Sara Lee Dutch Apple Pie we'd been eating for the previous 20-some years, I have made it a point to bring it to family gatherings. This Thanksgiving was no exception.
I am so excited to be sharing this recipe with you guys! It is probably my most practiced, most favorite, and definitely most YUMMY. The flaky crust and the gooey, cinnamon-y, apple-y goodness on my tastebuds. It's almost like a baby to me. I have held on to it for so long and shared with those that I love. It has grown from a crust that was always falling apart with bumps and bruises to this beautiful and stable vessel for these apples. It is now ready to be let loose into the world, and that it why I'm giving it a debut here on Two Hens! I know it's a little late for Thanksgiving, but Christmas is right around the corner, and you know, you could always just make a special occasion for this tasty little thing. It's THAT good! So without further ado ...

Lattice-Top Apple Pie

1 recipe for a 9-inch double crust
1/2 cup unsalted butter
3 Tablespoons all-purpose flour
1/4 cup water
1/2 cup white sugar
1/2 cup packed brown sugar
1 teaspoon cinnamon
5 granny smith apples - peeled, cored, and sliced
1 egg


Preheat oven to 425 degrees F. Melt the butter in a saucepan. Stir in flour to form a paste. Add water, white sugar and brown sugar, and cinnamon. Bring to a boil. Reduce temperature and let simmer, stirring often.
Link
Place the bottom crust in your pie pan.

Fill with apples, mounded slightly. Gently pour the sugar and butter liquid over the crust. Pour slowly so that is does not run off.... but just know that no matter how careful you are, you are probably going to want to put this thing on a baking sheet. This will also help with the after-baking clean up.. unless you like to spend time scrubbing out your oven.


Cover with a lattice crust. In a small bowl, whisk an egg with a small bit of water. Brush your egg wash all over the top of your crust. This will give you that beautiful golden brown top crust. Sprinkle the top generously with cinnamon.


Bake for 15 minutes in the preheated oven. Reduce the temperature to 350 degrees F and continue to bake for 35-45 minutes, until the apples are soft.
Let this cool for at LEAST 3 hours! This is a very important step. I promise. As much as you will want to cut and eat this right out of the oven, that is not a good idea. You will end up with Apple Pie Soup! Sounds yummy - but probably not what you're looking for. After at least 3 hours, dig in! Slice it up and pair with a big ole' scoop of Vanilla Bean. Oh yes please! Come to MAMA!

Monday, November 21, 2011

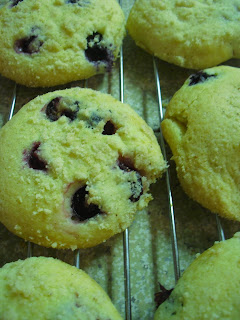
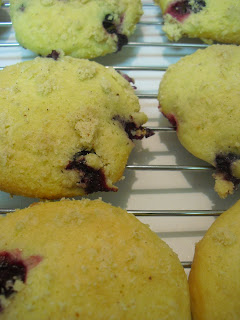
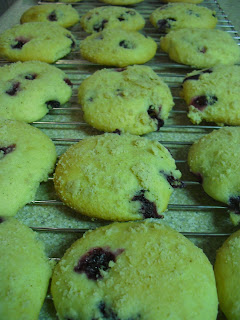
Blueberry Streusel Cookies


As the holidays are upon us, family traditions are all around us. Movies that we watch together as a family around the holidays. Games we play after we stuff ourselves with delicious meals. Concerts and lights we go to see around the holiday time. And of course, we can't forget those foods we eat and can't live without each and every holiday season.
Last week, I thought back to what holiday yumminess I have eaten year after year and what foods make me think of the holidays with my family. Blueberry streusel muffins. Those were a staple of every Christmas morning. Mom would make a batch of oatmeal and blueberry streusel muffins while we were anxiously waiting to see what Santa had brought for us. I sure do love me a blueberry muffin, but I wanted to come up with something that could be eaten morning, noon, and night... and then again for your midnight snack. Muffins are messy, you usually have to put it on a plate, and they're sometimes bigger than that quick snack you may want to grab. So I came up with an amazing cookie that very closely resembles a blueberry muffin. All the way to the streusel topping. My goodness, these are great! They're rich and cakey, yet a cookie so much easier to eat. The streusel topping adds this amazing crunch to the tops and edges of the soft pillowy cookie. And they don't fall into your coffee nearly as easily as a muffin would. I don't know about you, but I am not a fan of that goo at the bottom of your coffee mug after half your muffin has fallen in! Pretty sure this wouldn't happen with these cookies. Please try these cookies and let me know what you think about them. I personally think they're great and I kinda can't stop eating them! I'm happy to present these yummy pieces of heaven to you all.

Blueberry Streusel Cookies
makes 32 cookies

1/2 cup butter, softened
1 cup granulated sugar
2 eggs
1 teaspoon vanilla
2 1/2 cups sifted all-purpose flour
2 tsp. baking powder
1 cup blueberries

for streusel
4 Tablespoons butter, cold
1/3 cup all-purpose flour
2 Tablespoons granulated sugar
1 Tablespoon brown sugar
1 teaspoon cinnamon
1/2 teaspoon nutmeg


Mix butter with sugar. Beat with a mixer until light and fluffy.


Beat in eggs and vanilla until well mixed.

Add flour and baking powder and blend well.

Little Monkey Xander helped out with this step!

It is now time to fold in the blueberries. You want to be very gentle with a rubber spatula, folding the blueberries into the dough. You don't want to squish your berries - make sure they stay intact so they end up hot and gushy when the cookie is baked.

Wrap and refrigerate until well-chilled--3 hours or overnight. If you skip this step, you will end up with a very sticky and hard to work with dough.
Before taking out your dough, you need to make your streusel. Combine all ingredients with a pastry blender. You don't want to work it too much. You want to see little pea-sized balls of buttery dough.

Once the dough is completely chilled, form Tablespoon-sized balls in your hand. Dip the tops of the doughball into the streusel and place on a baking shape leaving an inch in between each cookie. Please pay no attention to my ugly baking sheets! I do take donations in the form of new baking-ware!

Bake in a 375 degree oven for 13-16 minutes, or until the edges of the cookies are golden brown.


What baking traditions do you have in your family during the holidays?? Come join the fun at the My Baking Addiction and GoodLife Eats Holiday Recipe Swap sponsored by Chicago Metallic in your blog post.

Wednesday, November 16, 2011

Delicious Tomato Basil Soup


Shut.the.front.door.and.hold.on.to.your.grilled.cheese.sammy.this.soup.is.a.MAZ.ing!
Seriously, this is possibly my new favorite soup. 'What can be so good about a tomato soup?' you ask. Oh my, where do I start? The velvety creamy texture. The underlying roasted red pepper flavor. The sharp bite of the tomatoes. The hint of basil.
So, if you live anywhere a Zupas Cafe and you've tried their Tomato Bisque, chances are, that is one of your favorite soups. I know that was the case for me. I am happy to say that I have found a way to top Zupas in my own home! It's that good!
No more tomato soup out of the can. This pretty little number does have quite a few extra steps outside of the normal 'mix milk or water with condensed soup and nuke for 3 minutes' instructions. In all honesty, most recipes I make during the weeknights aren't quite as time consuming as this one, but the results made up for it by far! On a chilly autumn November day, there's nothing better than a hot bowl of soup and a gooey stringy grilled cheese sandwich to dip into your soup. Please please... stop at the store tomorrow and pick up all the ingredients for this recipe. Your tastebuds will thank me!

Creamy Tomato Basil Soup
adapted from How Does She

2 (28 oz) cans of whole tomatoes (reserve juice)
2 Tablespoons brown sugar
4 Tablespoons butter
1 small onion, chopped
2 Tablespoons tomato paste
2-3 Tablespoons flour
2 (15 oz) cans or one carton of vegetable broth
2 fresh red peppers, roasted
1 cup prepared pesto
1.5 cups half and half (low fat or fat free substitutions fine)


Note: to roast peppers, cut them in half, clean out the seeds, and place them skin side up on a broiler pan. Broil them for about 20-25 minutes or until you notice the majority of the skin turning black. Don't be alarmed - they're not burned! Remove from oven and let cool. When fool enough to handle, peel off the black skins and cut in large chunks. Don't skip the red peppers! They're the secret ingredient!
Heat oven to 450 degrees. Line baking sheet with foil. Squeeze out seeds of tomatoes and arrange them on baking sheet. Sprinkle them with brown sugar. Bake until liquid is evaporated and tomatoes are caramelized (about 30 minutes).
Heat butter, onion, and tomato paste in large pot. The onions will take on a gorgeous color at this point. Saute until onions soften.

Add flour and cook for 1 minute. Gradually add vegetable broth and reserved tomato juice. Bring to a boil.

Add tomatoes and peppers and puree until smooth with an immersion blender. Or you can remove from pot in small batches and puree in a food processor or blender.

Return to put, simmer for 15 minutes. Five minutes before serving, add pesto and half and half.
Look at that beautiful green!
If you want to get real fancy, drizzle your cream over the top of each individual bowl. Classy.

It only took about 0.25 seconds to go from THIS...

To THIS!... mmmmmmmmmmmm